Blurry images can be a frustrating obstacle, particularly in today’s visually driven world where clarity and detail are crucial. Whether it’s for professional use, social media, or personal keepsakes, a clear image often holds the key to effective communication. However, dealing with blurry photos on a Chromebook can present unique challenges, especially since this platform doesn’t support traditional desktop software that many might rely on for image editing. But don’t worry; there are still effective methods available to unblur your images directly on a Chromebook.
In this article, we’ll explore how to unblur images using Chromebook-compatible tools and powerful online alternative. By the end, you’ll have the know-how to restore clarity to your images, ensuring they make the impact you intend.
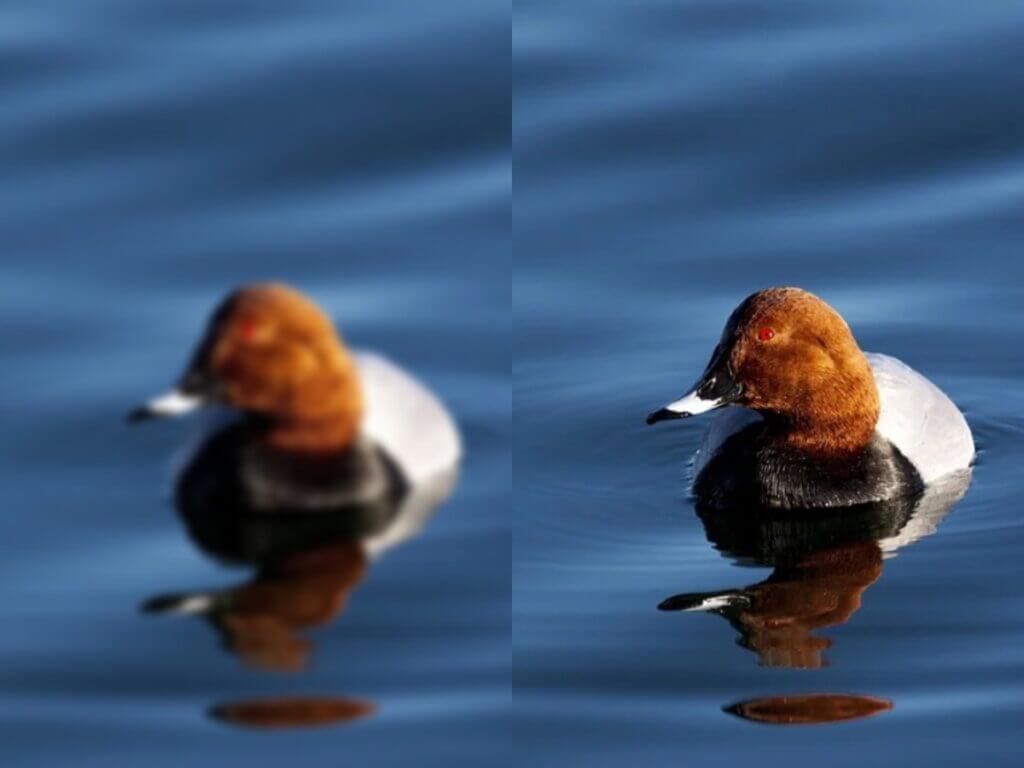
Understanding the Problem
What Causes Image Blur?
Before diving into solutions, it’s essential to understand what causes images to become blurry in the first place. Several factors can contribute to this issue:
- Camera Shake: One of the most common causes of blurry images is camera shake, which happens when the camera moves while the shutter is open. Even slight movement can result in a blurred image.
- Poor Focus: Another frequent culprit is incorrect focus. If your camera or smartphone fails to focus on the subject correctly, the result can be a soft, blurry photo.
- Low Resolution: Capturing images at a low resolution can also cause blurriness, especially when the image is enlarged. This lack of detail can make the photo appear fuzzy or unclear.
- Insufficient Lighting: Poor lighting conditions can force a camera to use a slower shutter speed, which increases the likelihood of blur due to motion.
Understanding these causes is the first step toward knowing how to address and potentially fix them using tools available on a Chromebook.
Why Chromebook Users Face Unique Challenges
Chromebooks, while popular for their affordability and ease of use, present particular challenges for image editing. Unlike traditional laptops or desktops, Chromebooks are designed primarily for online use and run on Chrome OS, which means they don’t support many of the traditional desktop applications that you might use on a Windows or macOS system.
Here are some of the challenges specific to Chromebook users:
- Reliance on Web-Based Tools: Since Chromebooks are optimized for cloud-based applications, users must rely heavily on web-based tools or Chrome OS-compatible apps for image editing.
- Hardware Limitations: Chromebooks generally have less processing power than standard laptops, which can affect the performance of more intensive image editing tasks.
These limitations make it essential to find Chromebook-friendly solutions that are both effective and easy to use.
Using Photoshop to Unblur Images
Photoshop provides several advanced tools to unblur images, allowing users to manually adjust sharpness and reduce blur with full control over the process. Here’s how to achieve clear results with Photoshop.
Step 1: Open Your Image in Photoshop
Launch Adobe Photoshop and open the image you want to edit. You can do this by selecting File > Open, then navigating to the image file on your device.
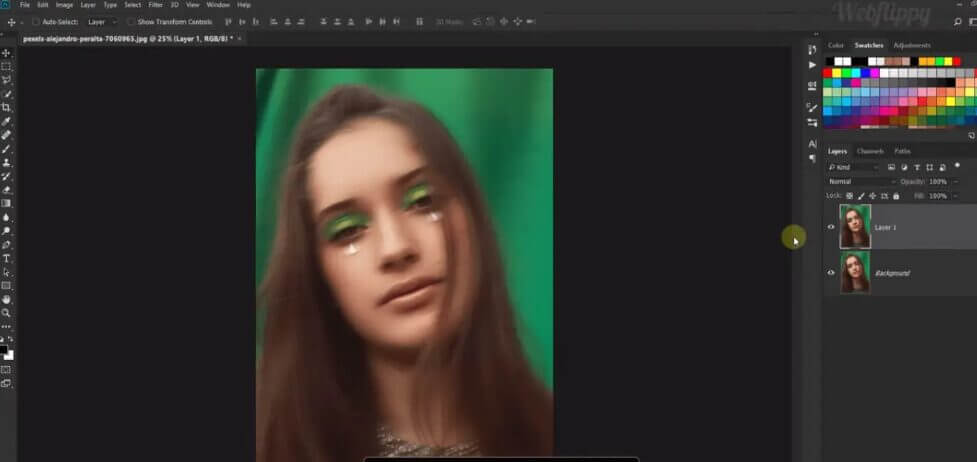
Step 2: Create a Duplicate Layer
To work non-destructively, first, duplicate the background layer. Right-click on the background layer in the Layers panel and choose Duplicate Layer. This ensures that the original image remains intact while you work on a separate layer.
Step 3: Apply the Smart Sharpen Filter
Photoshop offers a Smart Sharpen filter that allows you to reduce blur without losing too much detail. To apply this:
- Go to Filter > Sharpen > Smart Sharpen.
- A new dialog box will appear. Here, you can adjust the Amount (how much to sharpen) and Radius (how wide the sharpening effect will extend).
- You can also use the Reduce Noise slider to ensure that the sharpening doesn’t introduce unwanted grain or noise into the image.
- Once satisfied, click OK to apply the filter.
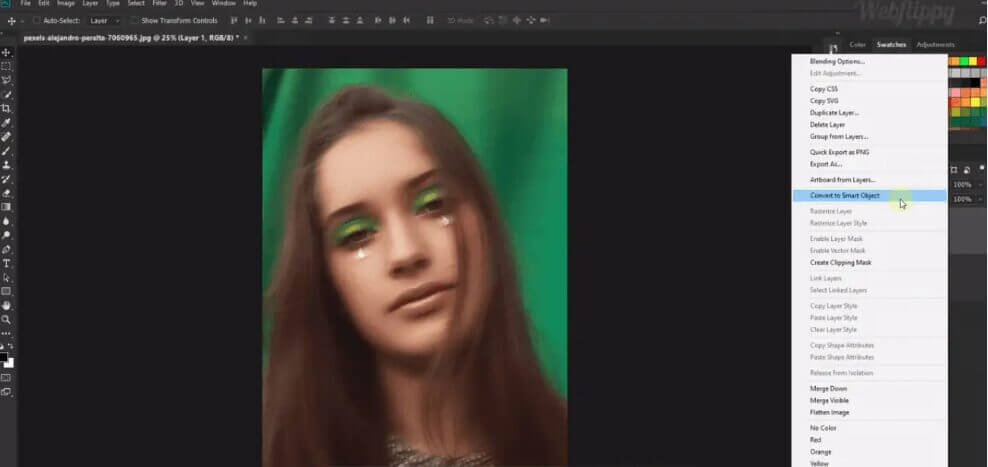
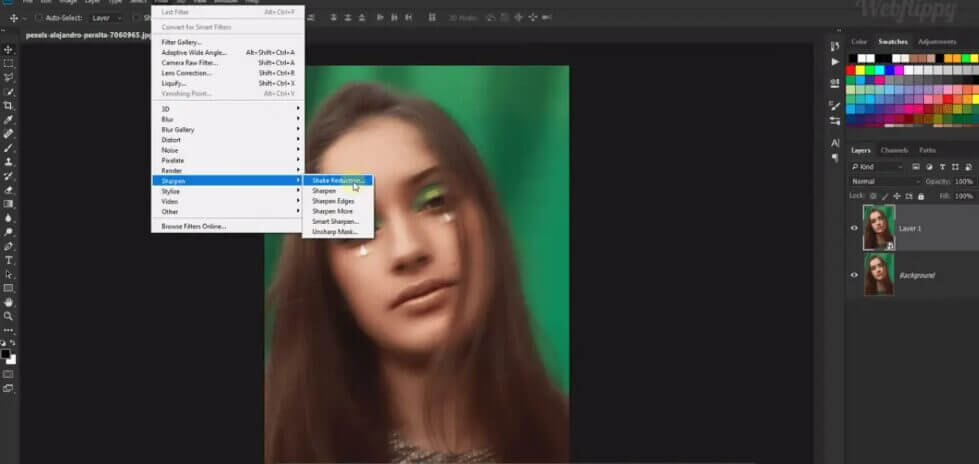
Step 4: Use the Shake Reduction Filter (if applicable)
If your image is blurry due to camera shake, Photoshop’s Shake Reduction filter can help correct that.
- Go to Filter > Sharpen > Shake Reduction.
- Photoshop will analyze the blur in the image and attempt to reduce it automatically. You can adjust the sliders for Blur Trace Bounds and Smoothing to fine-tune the effect.
- Click OK when you’re happy with the result.
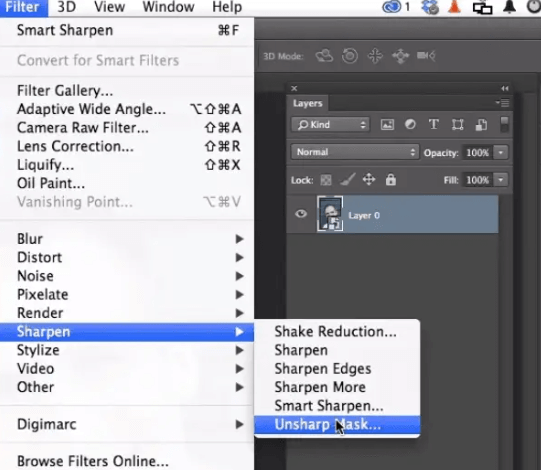
Step 5: Refine with the High Pass Filter (Optional)
For additional sharpening, the High Pass Filter can give your image a subtle boost in clarity.
- Create a duplicate layer of your sharpened image.
- Go to Filter > Other > High Pass and adjust the radius until the edges of the image are highlighted in gray.
- Change the blend mode of the layer to Overlay to apply the effect subtly. You can lower the opacity of the layer to control the strength of the sharpening.
Step 6: Final Adjustments
Once the sharpening process is complete, use tools like the Clone Stamp Tool or Healing Brush to clean up any remaining imperfections, such as noise or artifacts introduced by the sharpening.
Step 7: Save Your Image
When you’re satisfied with the final result, save your image by going to File > Save As and choosing your preferred file format. For web and social media use, JPEG is typically recommended, but if you’re preserving transparency, use PNG.
How to Unblur Images Using Face26
Why Face26 is a Great Alternative
While native Chromebook tools like Google Photos and third-party apps like Polarr and Pixlr are effective, they require manual adjustments and can sometimes be complex for users unfamiliar with photo editing. Face26, on the other hand, offers a streamlined, AI-powered solution that simplifies the process of unblurring images.
Face26 is an online tool that uses advanced algorithms to automatically detect and correct blurriness in photos, making it an excellent choice for users who want quick and effective results without a steep learning curve.
Step-by-Step Guide to Using Face26
Here’s how to unblur images using Face26 on a Chromebook:
- Access Face26: Open your Chrome browser and go to Face26.com.
- Upload Your Image: Click on the “Upload” button and select the image you want to unblur from your Chromebook’s storage.
- Apply the Unblur Tool: Once your image is uploaded, Face26 will automatically analyze the image and apply the necessary enhancements to reduce blur. The process is automated, so you don’t need to adjust any settings manually.
- Review the Enhanced Image: After processing, you’ll be able to preview the enhanced image. Compare it to the original to ensure the blurriness has been sufficiently reduced.
- Download the Image: If you’re satisfied with the results, click “Download” to save the unblurred image to your Chromebook.
Face26’s simplicity and effectiveness make it a powerful alternative for Chromebook users who need to quickly enhance their photos without getting bogged down in complex editing tools.
Advanced Tips and Techniques
Combining Tools for Best Results
For those looking to achieve the best possible results, combining tools like Google Photos and Face26 can be a great strategy. Here’s how you can use them together:
- Initial Sharpening with photoshop: Start by sharpening your image using Photoshop to make basic improvements.
- Further Enhancement with Face26: After the initial sharpening, upload the image to Face26 for additional AI-driven enhancements. This combination of manual and automated adjustments can lead to superior results.
Avoiding Common Mistakes
Unblurring an image can be tricky, and there are a few common mistakes you should avoid:
- Over-Sharpening: Adding too much sharpness can introduce noise and artifacts, making the image look unnatural. Always apply sharpening gradually and check the results in real-time.
- Ignoring the Original Resolution: If the original image is low resolution, trying to sharpen it too much can lead to poor results. It’s important to work within the limits of the image’s original quality.
- Not Previewing Changes: Always preview your changes before finalizing them to ensure you’re not introducing unwanted effects.
Tips for Maintaining Image Quality While Reducing Blur
To maintain the best possible image quality while reducing blur, follow these tips:
- Start with the Best Quality Image: Always start with the highest resolution version of the image you have. Higher resolution images have more detail, which can be preserved during the sharpening process.
- Use Multiple Tools: Don’t rely on just one tool. By combining different tools and techniques, you can often achieve better results.
- Save Incremental Versions: Save your work at different stages so you can easily revert to an earlier version if needed.
We’ve covered various methods to unblur images on a Chromebook, from using Photoshop to unblur images and automated AI tools like Face26. Each tool offers unique advantages depending on your needs, whether you’re looking for a quick fix or a more detailed editing process.
Don’t hesitate to experiment with these tools. Each one has its strengths, and combining them can often yield the best results. Whether you need a quick enhancement or more refined edits, these Chromebook-friendly solutions have you covered.
FAQs
How can I unblur images on a Chromebook without downloading any software?
Use Google Photos or Face26 directly in your browser for easy, software-free image unblurring.
Is it possible to unblur an image entirely?
Restoring perfect clarity is difficult, but tools like Face26 and Google Photos can significantly improve image sharpness.
What is the best app for unblurring images on a Chromebook?
Google Photos and Face26 are top choices, offering user-friendly and effective results.
Can I use Face26 to unblur multiple images at once?
Yes, Face26 allows for quick batch processing of multiple images.
Does unblurring an image reduce its quality?
If done excessively, unblurring can introduce noise or artifacts. Apply sharpening gradually and preview results.


