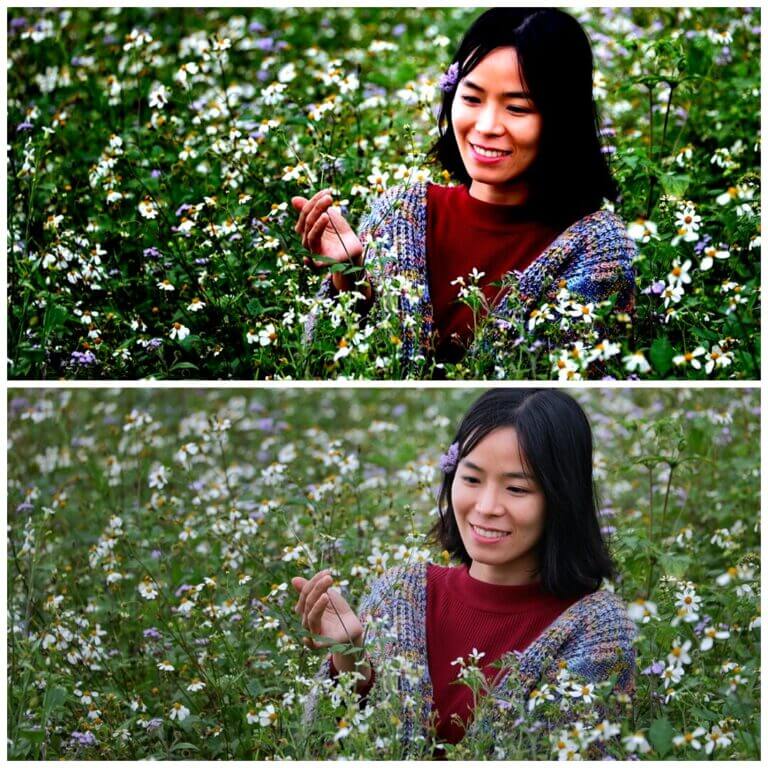
Overexposure is a common challenge faced by photographers, resulting in images that are too bright, lack detail in the highlights, and appear washed out. Adobe Lightroom, a powerful photo-editing tool, offers various methods and tools to correct overexposed photos and bring them back to life.
In this guide, we’ll explore how to fix overexposed photos in Lightroom and provide step-by-step instructions for achieving the best results. We’ll also introduce an alternative tool, Face26, for users seeking a simple and effective solution.
Understanding Overexposure
What Is Overexposure?
Overexposure occurs when a photograph receives too much light, causing certain areas—typically the highlights—to lose detail. These “blown-out” areas appear as bright white patches with no texture or information. While slight overexposure can be fixed, severe overexposure can result in the loss of important details that cannot be recovered.
The Role of Histograms in Identifying Overexposure
A histogram is a visual representation of the tonal values in your photo, showing the distribution of shadows, midtones, and highlights. In Lightroom, the histogram is located in the Develop module, and it helps photographers determine if their image is overexposed.
If the histogram is pushed all the way to the right, it indicates an overexposure problem, and those bright areas might need to be corrected.
Identifying Overexposed Photos in Lightroom
Histograms and Spotting Overexposed Areas
When working in Lightroom, the histogram is a critical tool for spotting overexposure. It shows you which parts of the image might be clipped (either highlights or shadows). Overexposed areas will cause the histogram to spike on the right side, indicating that the image has areas that are too bright and lack detail.

Importance of Shooting in RAW
To maximize the potential for recovery, always shoot in RAW format rather than JPEG. RAW files retain much more detail and color information, allowing for more flexibility during editing. When a photo is overexposed, having a RAW file enables you to recover more detail using Lightroom’s sliders and tools, which would otherwise be lost in a compressed JPEG format.
Step-by-Step Guide to Fixing Overexposure in Lightroom
1. Adjusting Highlights and Whites
- Highlights Slider: Start by moving the Highlights slider to the left. This adjustment specifically targets the brighter areas without affecting the overall exposure. Drag the slider slowly and watch how the bright areas begin to recover detail.
- Whites Slider: Next, move the Whites slider to the left to reduce the intensity of the brightest parts. Be careful, as lowering this too much may cause the image to appear flat. Use a value that balances brightness while retaining detail.

2. Working with the Exposure Slider
- The Exposure slider affects the overall brightness of the image. If your entire image is overexposed, lowering the exposure may help. However, reducing exposure will also darken shadows and midtones, so it’s crucial to monitor the histogram and ensure that adjustments don’t compromise other areas of the image.
3. Utilizing Advanced Tools

- Adjustment Brush: This tool allows for precise corrections on specific areas of the image. For example, if only the sky is overexposed, you can use the Adjustment Brush to reduce the exposure of the sky without affecting the rest of the photo.
- Graduated Filter: This tool is particularly useful for overexposed skies. Drag the filter from the top of the image downward, then reduce the exposure or highlights to balance the sky with the rest of the image.

- Radial Filter: If a specific subject, like a person’s face, is overexposed, the Radial Filter can target that area for more refined adjustments. Place the filter over the area and reduce the highlights and whites to regain detail.
How to Fix Overexposed Photos in Lightroom: Advanced Techniques
1. Using the Tone Curve for Nuanced Adjustments
- The Tone Curve offers more advanced control over the tonal range of your image. By creating control points along the curve, you can target and adjust specific tones, such as highlights, midtones, and shadows, independently. Lower the upper-right part of the curve to reduce the brightest areas while maintaining the integrity of midtones and shadows.
2. Employing Range Masking
- Range Masking is an advanced feature that allows you to target specific luminance values. For instance, you can use the Luminance Range Mask with the Brush or Gradient tools to limit your adjustments only to the brightest parts of the image. This precision ensures that your corrections don’t affect other parts of the photo, resulting in a balanced and well-exposed image.
Using Face26 as a Simple Alternative

Face26 is perfect for users who prefer a user-friendly, automated method for correcting overexposed photos. It uses advanced AI technology to quickly identify and adjust problem areas in photos, ensuring balanced and natural results.
Step-by-Step Guide to Using Face26

- Upload Your Photo: Start by uploading your overexposed image to the platform.
- Automatic Analysis: Face26’s AI technology analyzes the image to detect overexposed sections while preserving other details.
- Apply Corrections: Face26’s image enhancer will automatically adjust brightness, highlights, and shadows to restore lost details.
- Fine-Tune the Image: Users can further refine the adjustments using simple sliders for precise control over exposure, contrast, and color balance.
Benefits of Using Face26

- Ease of Use: Face26 simplifies the process, making it accessible even for beginners who may find Lightroom complex.
- Time Efficiency: The automated adjustments are quick, allowing users to fix overexposed photos in just a few clicks.
- AI Precision: The AI technology ensures accurate corrections, enhancing the quality of the image while maintaining its natural look.
- No Software Installation Required: As an online tool, Face26 eliminates the need for downloading or installing software, providing flexibility for users on different devices.
This makes Face26 a practical and effective alternative for those looking to correct photo exposure issues effortlessly.

Preventative Tips to Avoid Overexposure
While Lightroom and Face26 provide excellent tools for correcting overexposed photos, prevention is always better. Here are some tips to avoid overexposure during your photo shoots:
1. Understand Your Camera’s Metering Modes
Modern cameras offer different metering modes (e.g., evaluative, spot, and center-weighted). Knowing how these work allows you to choose the right one for the lighting conditions. Spot metering, for example, measures light in a small area, which can be useful when photographing subjects in high-contrast environments.
2. Use Exposure Compensation
If you find that your camera tends to overexpose photos, use the exposure compensation feature. Adjusting it to -0.3 or -0.7 stops can prevent bright highlights from being blown out while capturing detail in shadows.
3. Shoot During the Golden Hour
The quality of light plays a significant role in exposure. Shooting during the golden hour (early morning or late afternoon) provides softer, warmer light, reducing the risk of overexposure compared to shooting under the harsh midday sun.

Fixing overexposed photos in Lightroom requires understanding the tools and techniques available for recovery. By using the Highlights, Whites, and Exposure sliders effectively, and employing advanced tools like the Tone Curve and Range Masking, you can transform overexposed images into well-balanced photos. For those seeking a simpler alternative, Face26 offers a quick and intuitive way to fix exposure issues using AI technology.
Experiment with these methods to find what works best for your photography style. Over time, you’ll become proficient at managing exposure both in-camera and in post-processing, ensuring your photos always look their best.
FAQs
1. How do I fix overexposed photos in Lightroom mobile?
To fix overexposed photos in Lightroom mobile, use the Highlights and Whites sliders in the editing panel. You can also access the Exposure slider for overall brightness control. Utilize the Adjustment Brush and Gradient tools for targeted adjustments if necessary.
2. Can I fix overexposed photos online?
Yes, tools like Face26 offer online solutions to fix overexposed photos. Simply upload your image, and the AI will adjust the brightness, highlights, and shadows automatically.
3. What is the best format for fixing overexposure in Lightroom?
Always shoot in RAW format for maximum flexibility during editing. RAW files contain more data, making it easier to recover details lost in overexposure compared to JPEG files.
4. How can I prevent overexposure when shooting?
Use exposure compensation, choose appropriate metering modes, and shoot during times of softer natural light like the golden hour. These steps help control the amount of light entering your camera, minimizing overexposure.
5. Is Face26 a good alternative to Lightroom for fixing overexposure?
Face26 is an effective alternative for those who prefer a simpler approach. It uses AI to automatically adjust exposure and recover details, making it an excellent option for quick fixes without diving into manual editing.


